Table of Contents
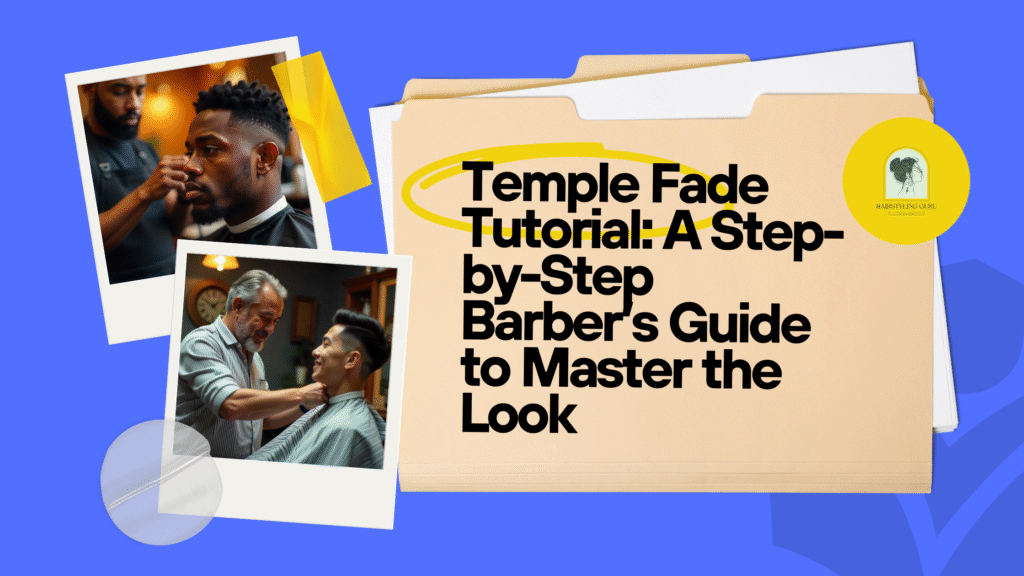
Introduction: Why the Temple Fade Is the Cut Everyone Wants
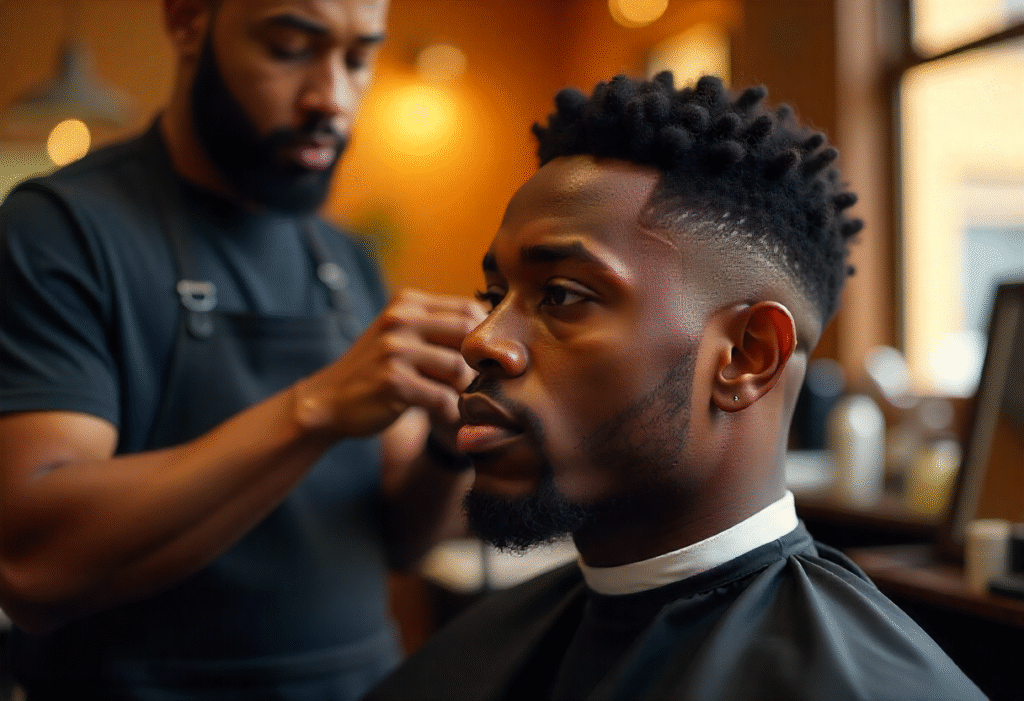
Not your usual haircut, but the moment to take pride in by its precision, style, and versatility, Temple Fade (with another name, Brooklyn Fade or Blowout Fade) is the fashion you are to be proud of. Described as the clean, sharp taper around the temples and the sideburns, the temple fade is now preferred among both the contemporary barber and their clients. It is stylish, low-firing, and complements nearly any style of hair on the top, waves, curls, afros, twists, slick backs, or even mohawks.
Then, what makes the Temple Fade trendy? It is new, cool-looking, without being outlandish. The fade improves the face profile, brings out contrast, and leaves your whole appearance improved in an instant. No matter which side of the Clippers you are on, ladies will have Talia talk about this as the fade that gets compliments.
Who is it addressed to? As far as the face shapes are concerned, the temple fade suits almost all of them, not to mention that it looks fantastic with a variety of hair textures ranging from coarse, curly, straight, and wavy. It perfectly suits men who want to wear a cool fade without cutting off much hair at the sides and edges.
However, this step-by-step tutorial will help you know how to cut a perfect temple fade, how to fade and blend with confidence, and the little things that set it all apart. You might be a future barber, or just simply a guy who wants to improve his at-home cutting abilities. In either case, you have landed in the right place because, drop by drop, I am going to teach you how to achieve one of the most requested haircuts currently.
Understanding the Temple Fade: What Sets It Apart
A Temple Fade is on precision and detail. It has sharp tapering, which begins at the temples and fades well into the hairline and the sideburns. This delicate graduation forms a neat contrast of the skin and the hair, adding structure without taking away the volume at the top. It is a popular element in the barbershops due to its clean and sharp look, which fits a number of hair types.
So let us take apart the anatomy:
- Temples: The fade is initiated slightly above the temple region or about the region to have that typical cut-in appearance.
- Sideburns: These are wispy or have even faded away, depending on the fashion.
- Taper Zone: The space between the temple and the ear will be transitioned gradually to the skin or made a bit longer as per the liking of the client.
Compared to other fade types:
- Low fade will begin lower on the neckline and the arm region.
- A high fade is a fade that goes higher along the sides and back.
- A burst fade extends out in a curvy form around the ear.
The temple fade is very direct, a more contemporary cut, which provides the clean edge around the temples and hairline, so it fits best in the styles focused on edges, such as curly crops, box cuts, waves, or even undercut variants.
Tools You’ll Need Before You Begin
Just the same, prior to taking a dip into your temple fade, you need to have your station equipped with the right equipment. Accuracy and cleanliness are two terms that marry with clean fades.
Core Barbering Tools:
- Adjustable clippers, with attachment to the clipper, include guards (at least # 0.5 to # 2).
- Outlining and detailing theemple and neckline trimmers
- A comb to mix and orient hair during cutting
- Shears that cut any required form of hair are used on the head
- Mirror to reflect symmetry and proportionality, a nd complementary precision in all directions
Optional (but Pro-Level) Add-ons:
- In skin-tight temple finishing, a foil shaver will be used
- Sharpening spray or fibres to line up better photos or events
- Wicked ultra-crisp edges: straight razor
Pro Tip: After using and before using your tools, be sure to sanitise them. Cleanliness also promotes a sense of trust, and this assists you in attaining the clean cut, skin-friendly touch every temple fade requires.
Prepping the Hair

Step 1: Wash & Dry
Use clean hair. Clogged clips, wash, and oil may distort the performance of the clippers and line visibility. Hand-dry or use a blow-dry to have a manageable texture.
Step 2: Detangle & Section
Then use a wide-toothed comb to detangle the hair and part it, should it be necessary. To have longer or curly styles, clips or parting is most suitable to prevent the top hair from falling into the fade area.
Step 3: Choose the Fade Level
Decide how bold or subtle the temple fade should be:
- Low temple fade: Low and smooth, with a slight grip around the temple region.
- Mid temple fade: above, perfect for twists or curly tops.
- Sharp edge temple fade: Super defined, having a tight skin finish and a clean hairline.
After gearing up the hair and getting the plan, you are all set to begin developing the fade with a cool and composed head.
Check Out: Color Protection Tips: Best Practices for Vibrant Copper & Red Hair.
Step-by-Step: How to Cut a Perfect Temple Fade
Step 1: Establish the Baseline
It starts by marking out the natural temple area, which is normally just above the sideburns and a bit ahead towards the forehead. With a trimmer, cut yourself a nice guideline; this will determine the height or the depth at which you want your temple fade.
Step 2: Create Your Transition Zones
And we begin fading up now. Clip with your #0.5 guard slightly above the baseline, flick upward so that you do not establish a new hard line. Then go to a #1 guard, which is a little above that. The transition zone should be finished with a #1.5 or #2 guard to join the fade to the top or sides.
- Try to smooth transitions using the flick-out move.
- Keep the clipper flat in order to have a smoother, cleaner cut in bulk areas.
Step 3: Refine the Blend
Fade is given detail, making it look professional. Aim with your clipper lever (closed and open) at the remaining lines. The open lever finishes a bit longer, which assists you in being able to erase demarcation without options to jump into a higher guard.
- To do this, accurately use the end of the blade.
- Combine on different angles-evaluate your work in the mirror or by using different lights.
Step 4: Sharpen the Edges
It is the crisp edges that make the temple fade pop. With the help of your trimmer or liner, give the hair around the temples and forehead a formal shaping. Use the natural contour and maintain the line, and do not exaggerate.
Want more sharpness? Gently run edges along with a straight razor to get that surgical touch, which many clients might like to have to appease the internet.
Common Temple Fade Mistakes to Avoid
Even a qualified barber may mess up when he is in a hurry or when he does not pay attention to details. This is what to watch out for:
- Fading too low or too high: The temple fade should be left in the middle, where the forehead starts to turn towards the ear; going too low will make it a low fade.
- Unbalanced blends: Never forget to check both sides for consistency. Flaws can be covered with lighting and the adjustment of the angle.
- Overlining: Cutting too low into the hairline will give edges an artificial effect and harm the natural growth line pattern.
Tips for Different Hair Types
There is a difference in how every hair texture responds to fading. That is how you can adjust your strategy:
Curly Hair
- Take longer guards to maintain the curl.
- When fading, use a stretch of the curls to give accuracy.
Straight Hair
- Straight hair reveals more lines; hence, blending should not be visible.
- Take advantage of the corner of the blade and the flicking to prevent banding.
Coarse or Thick Hair
- Bring the higher guard first into debulk and then fade.
- In case the hair does not blend well, use the clipper-over-comb technique.
Maintaining the Temple Fade: Barber & At-Home Tips

Temple fades are clean–they do not grow out so fast. Make it fresh in the mind of your clients (or yourself):
- Frequency of touch-up: Best appearance: 1- 2 times per week.
- Products: During a dew, I use a product that keeps the shape, and once soft, edge control, pomade, or light oil.
- Brushing: A soft surface brush teaches the hair to stay in the direction and prevents any buildup in the fade area.
In case clients are unable to make full cuts, advise them to book short line-up cuts.
Final Touches: Elevate the Fade With Style
The fade works on the temple when there is the appropriate style of a to,p, as well as a finish.
- Matching combinations: Waves, clean curls, mini twists, afro tops, and even slicked back undercuts.
- Improvements: Place a side part and design in i,t, or create a beard fade mix to make it more present-day.
- Signature finish: light spray or sheen finish, sh and make sure that you always leave the neckline clean by drying.
Conclusion: Master the Temple Fade—One Clean Cut at a Time
But the temple fade is not an ordinary haircut, but a style that is a combination of both precision and style. Whether it is the sharp taper at the temples or an easy blend into any hairstyle, the ability to perfectly manage this fade makes you stand out as a competent barber or backyard hobbyist. Using the proper tools, techniques, and precision, you can give them a fresh, contemporary cut that will fit on any hair texture and head shape.
If you are fading somebody or yourself, then this step-by-step template fade tutorial will give you the skills and confidence so that you will be able to blend, edge, and finish like a pro. It is now time to get down to business and make that fade a notch higher using those clippers.
For more info: Click Here.
FAQs: Temple Fade Edition
1. What is the duration of a temple fade?
The duration that a temple fade stays sharp is usually 7 to 14 days, based on how fast hair grows and maintenance. A touch-up needs to be done once in 1 to 2 weeks to maintain the edges.
2. Is it possible to perform a temple fade at home using non-professional devices?
Although basic fade may be performed at home with household-brand trimmers and clippers, it is quite challenging to achieve a smooth transition and clean edge otherwise. Learners are advised to take time and observe tutorials when they want to do a DIY fade.
3. Which are the best-looking hairstyles that suit a temple fade?
The temple fade is also suitable in a broad scope of styles, such as:
- Waves or curls
- Afros or sponge twists
- Tapered box cuts
- Undercuts and mohawks
It is very versatile and would look nice on short and medium-length hair.